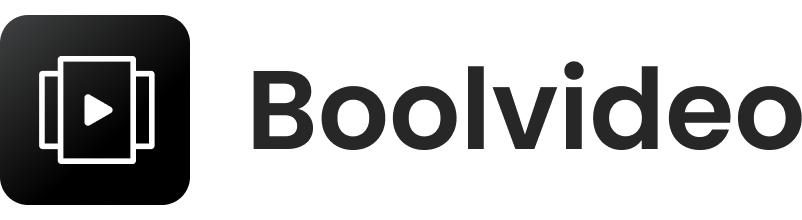
Boolvideo is a comprehensive video editing platform that allows users to create and edit videos using various tools such as importing media, adding text overlays, and using graphics. The timeline editor enables precise control over every detail of the video, ensuring the final product meets your expectations.
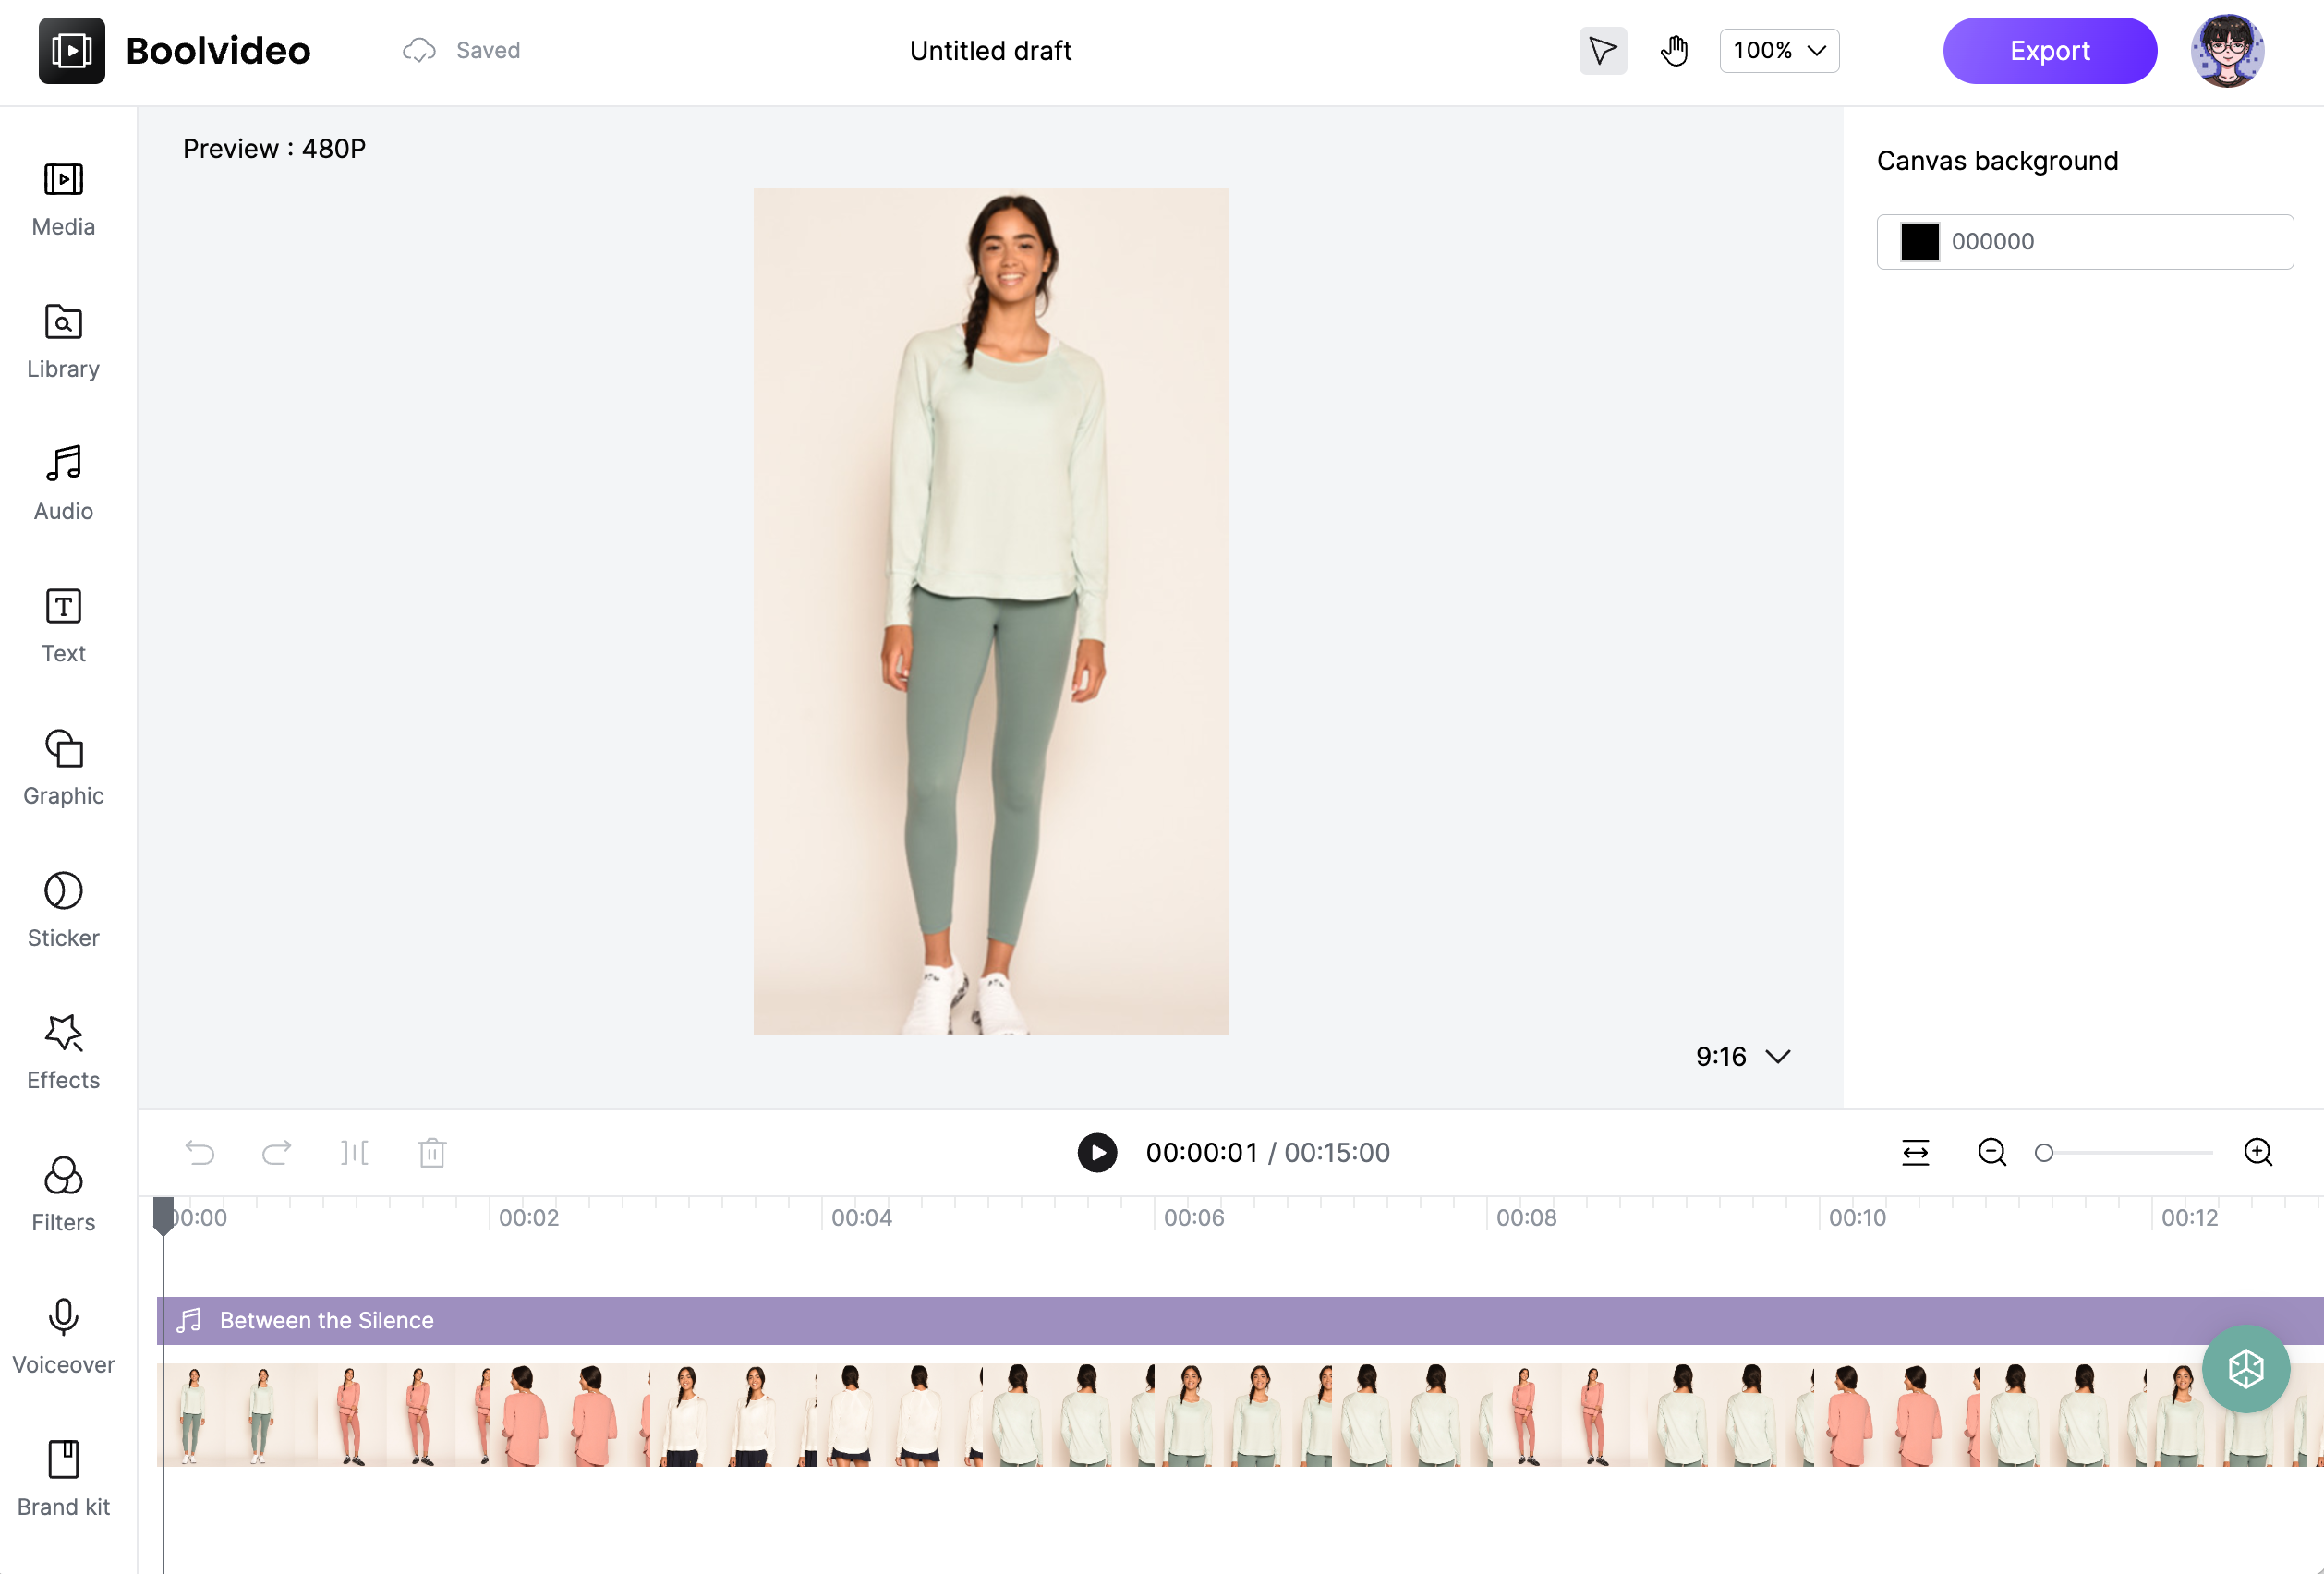
Starting a project:
First, select a suitable video aspect ratio, such as 1:1 (suitable for Instagram), 16:9 (suitable for YouTube), or 4:5 (suitable for Facebook). It is recommended to use a 9:16 ratio (suitable for TikTok, Instagram Reels, YouTube Shorts, Etsy Listing, etc.) for the best video effects.
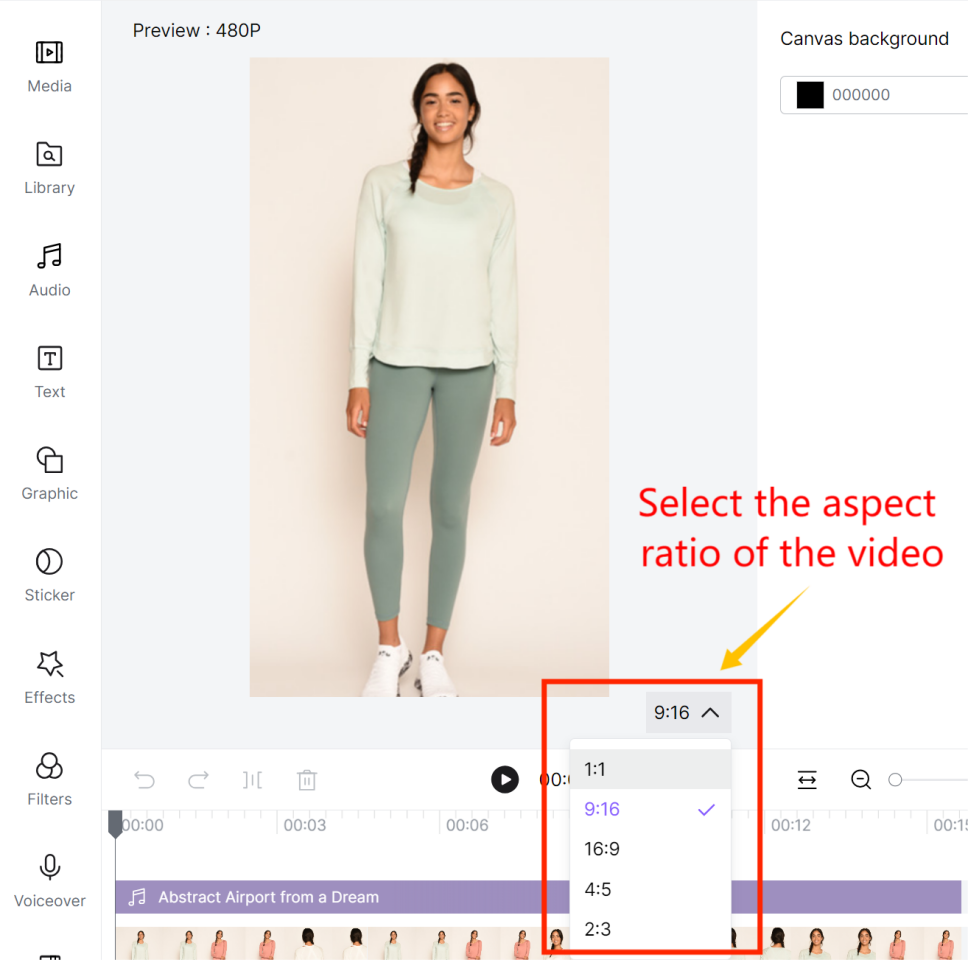
Media & library:
After uploading a local video to the media, you can also use keywords to search and import the required materials into the timeline from the library.
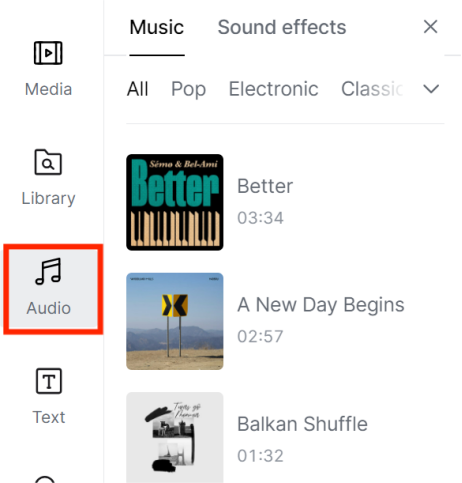
Audio & Voiceover:
In the "Audio" tab, browse available background music or sound effects by searching keywords.
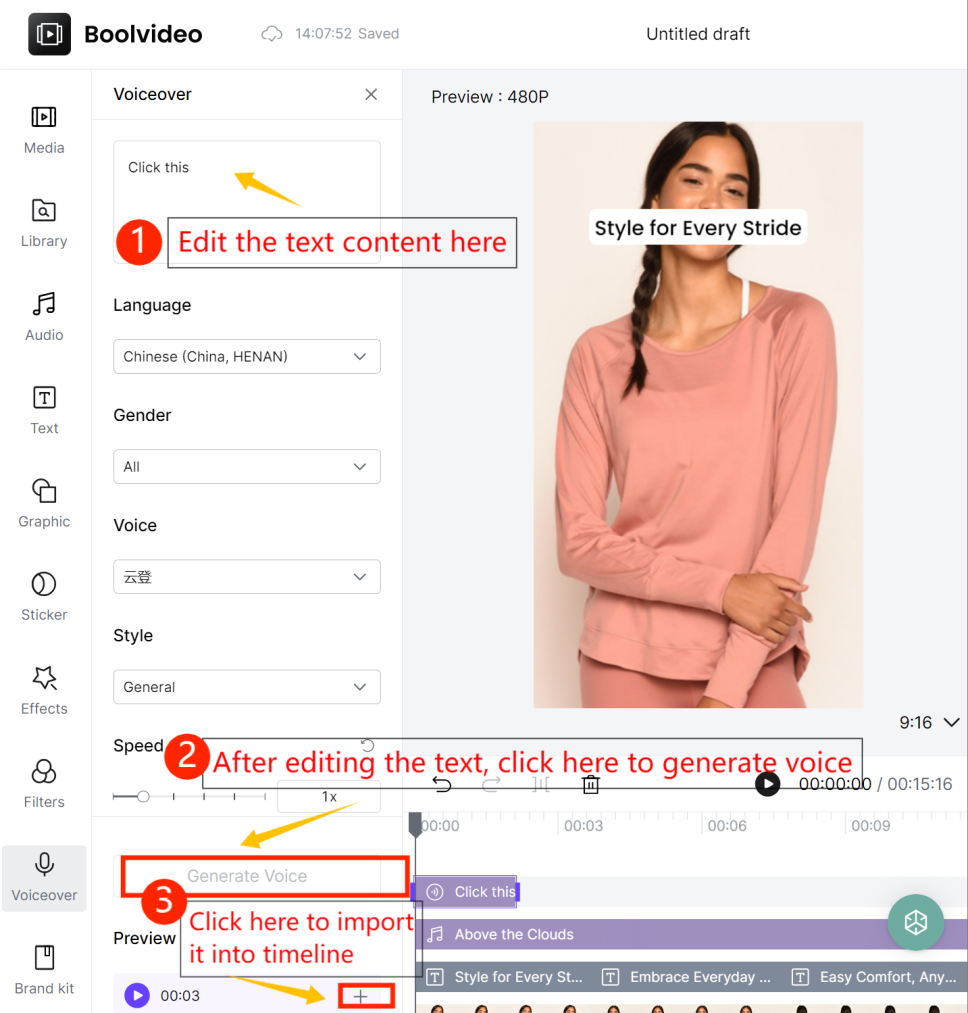
In "Voiceover", edit the text content and select the language, gender, speech rate, etc. After generating, click the "+" button in the Preview area to import it into the timeline.
Editing clips:
Video editing: Click on the clip on the timeline and use tools to cut, trim, or split. Hold the left mouse button to select a material and drag to adjust the sequence of the material segments.
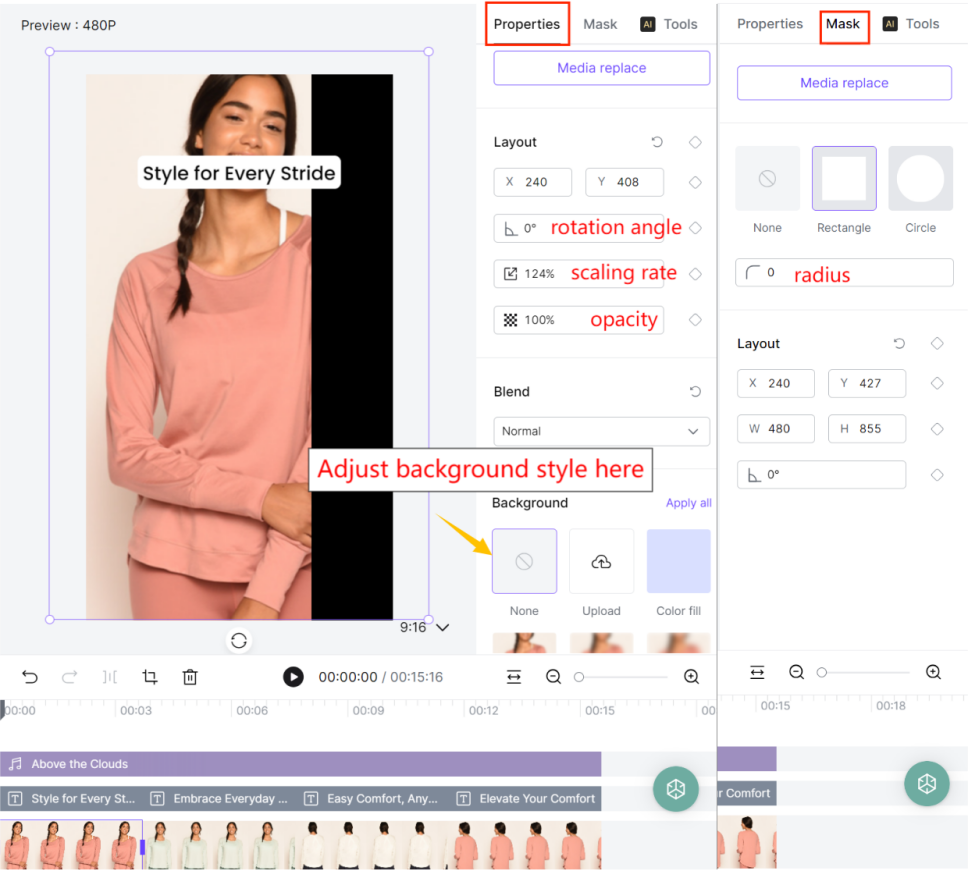
There are three property modes on the right side of the editor:
1) Properties mode: Allows changes to the layout of any image/video on the timeline on the display, such as material position, rotation angle, scaling ratio, opacity, blend style (this option allows users to select different blending modes to determine how the current layer combines with the layer below), and the style of the background.
2) Mask mode: Allows changes to the shape (rectangle/circle), position, rotation angle, and size of any image/video on the timeline.
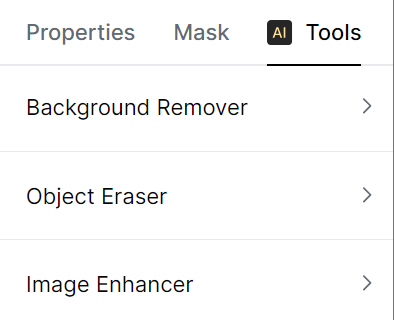
3) AI Tools: Includes background remover, object eraser, and image enhancer
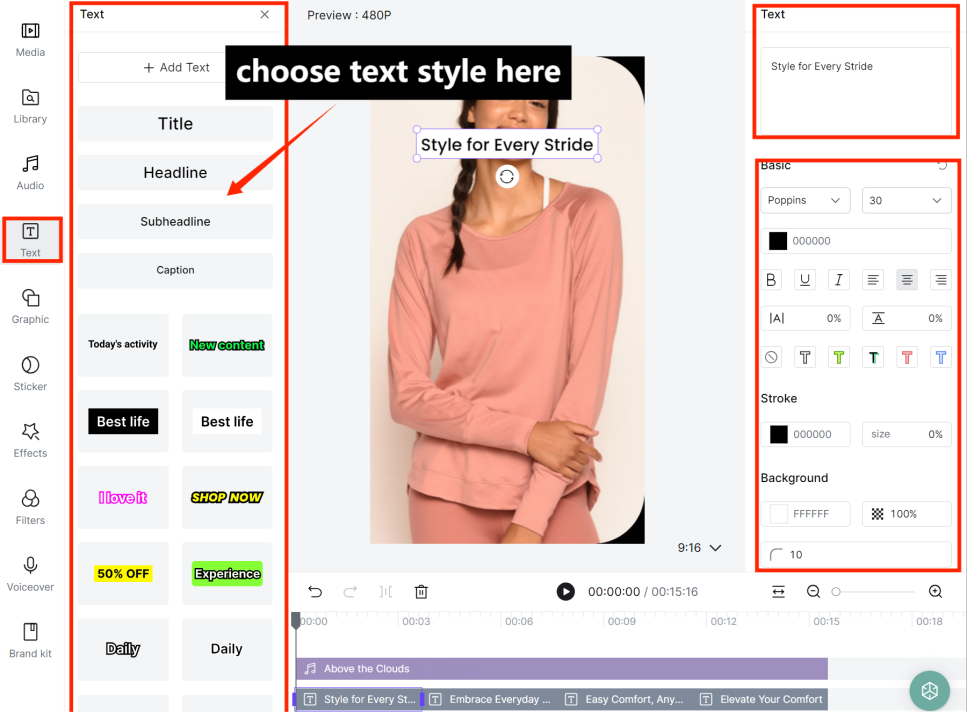
Add text:
Select the Text tab, drag the selected style into the video, and customize the content, color, size, and effects.
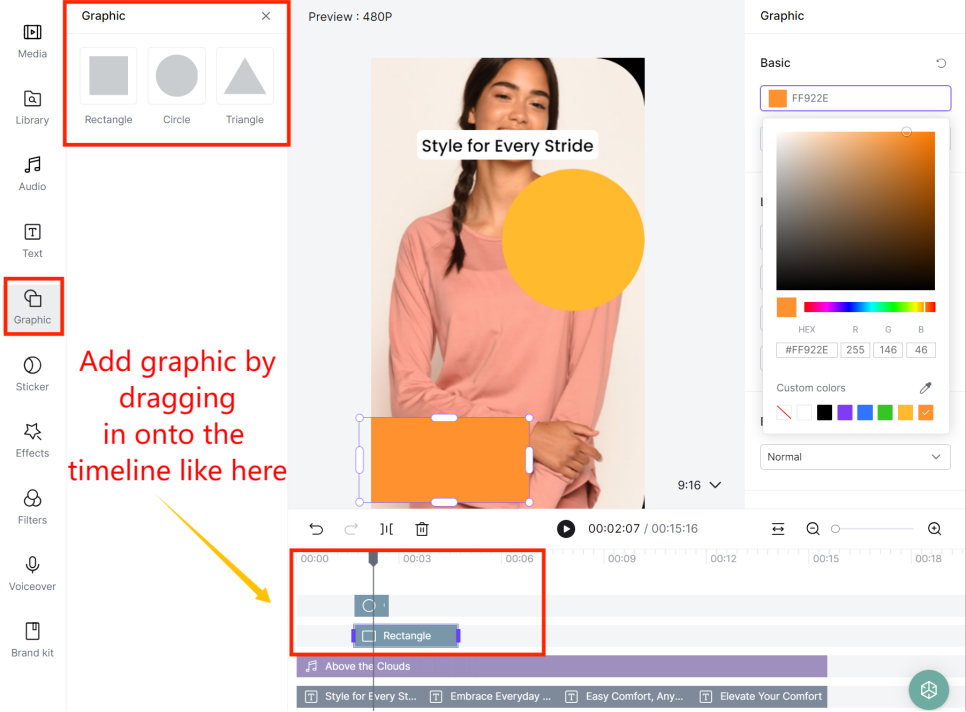
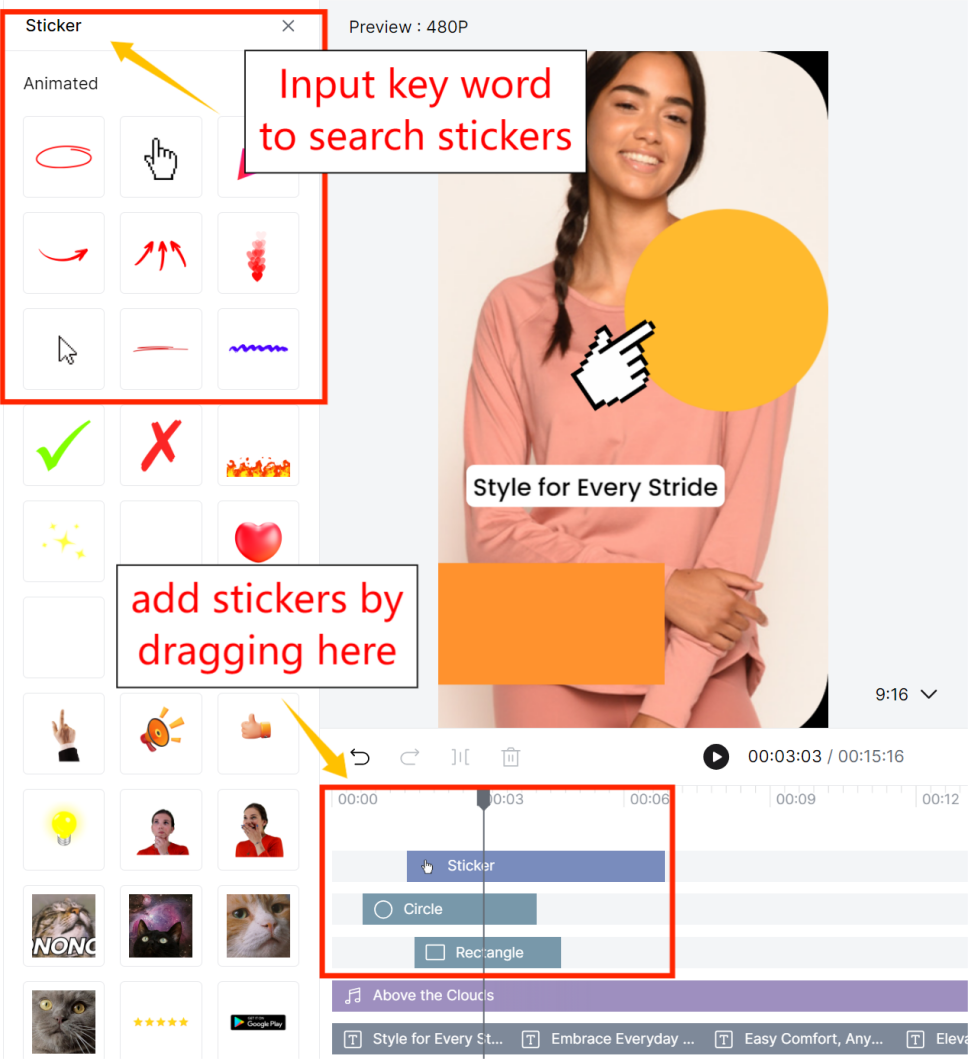
Using graphics and stickers:
In the "graphic" and "sticker" tabs, select elements to add to the video, which can be dragged onto the timeline just like text.
Graphics added can be in the form of squares, circles, and triangles, and you can adjust their color and basic layout.
Stickers come in various styles, including animated, arrows, e-commerce, labels, etc.
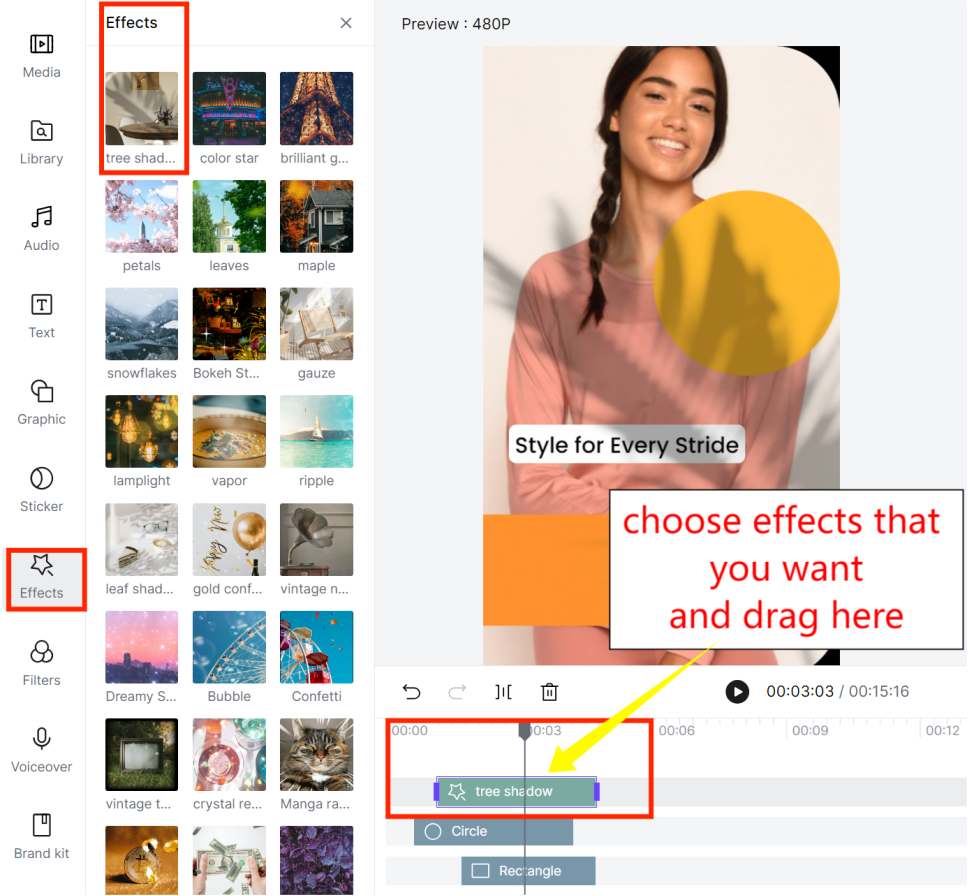
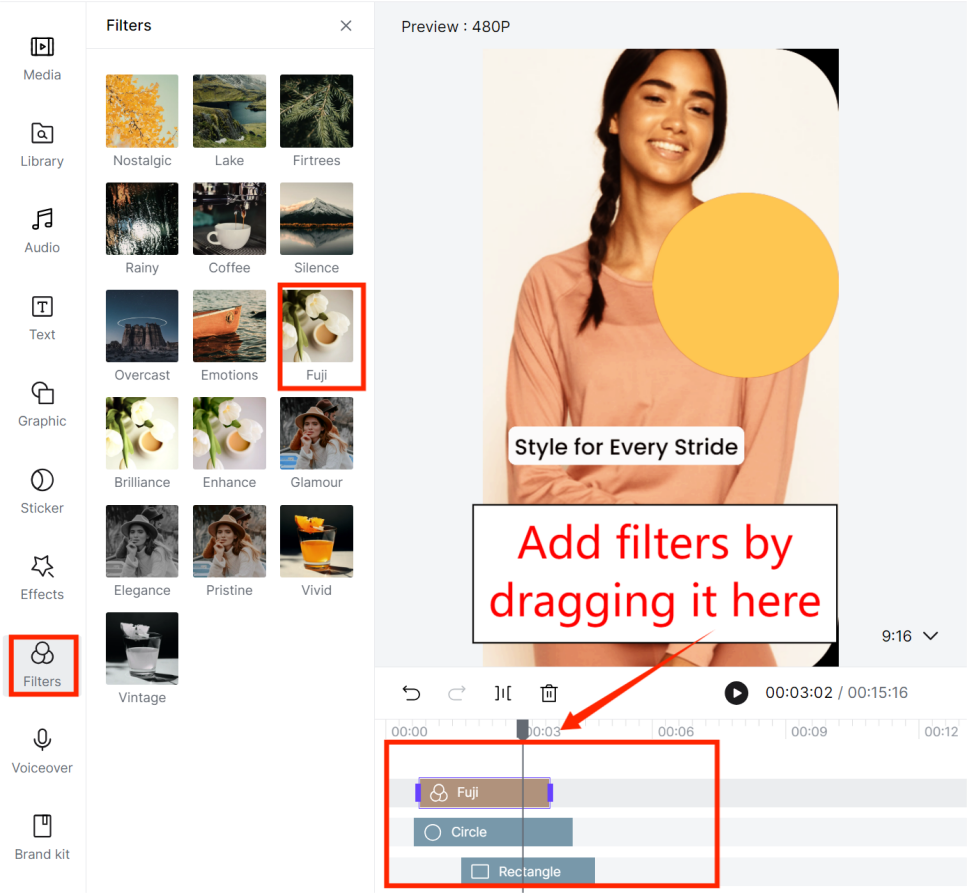
Applying filters and effects
Enhance your videos by applying filters and effects. Select a clip, then choose to add visual effects or color correction in the "Effects" and "Filters" sections.
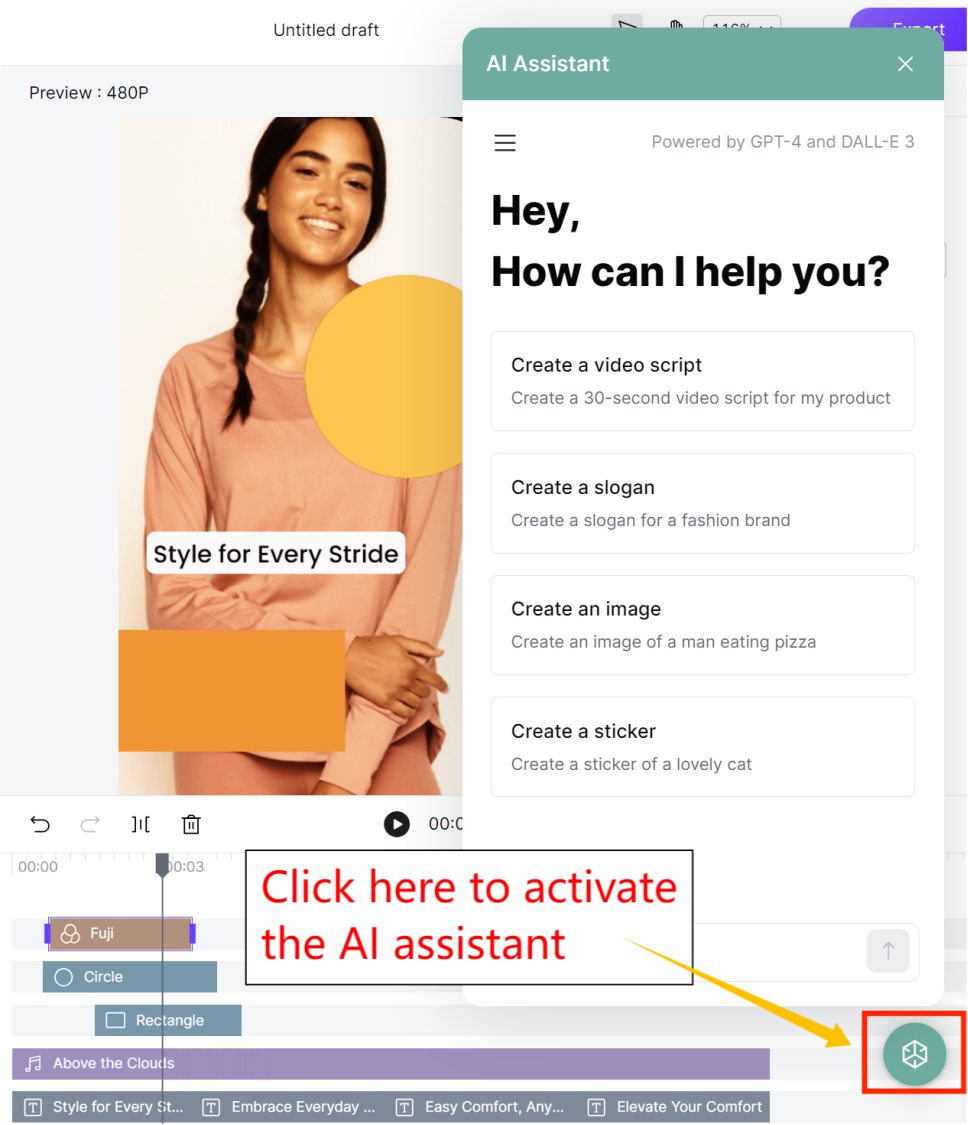
AI assistant:
Click the green corner icon at the bottom right of the page to activate the AI assistant, which helps generate creative copy or images and directly imports them into the timeline.
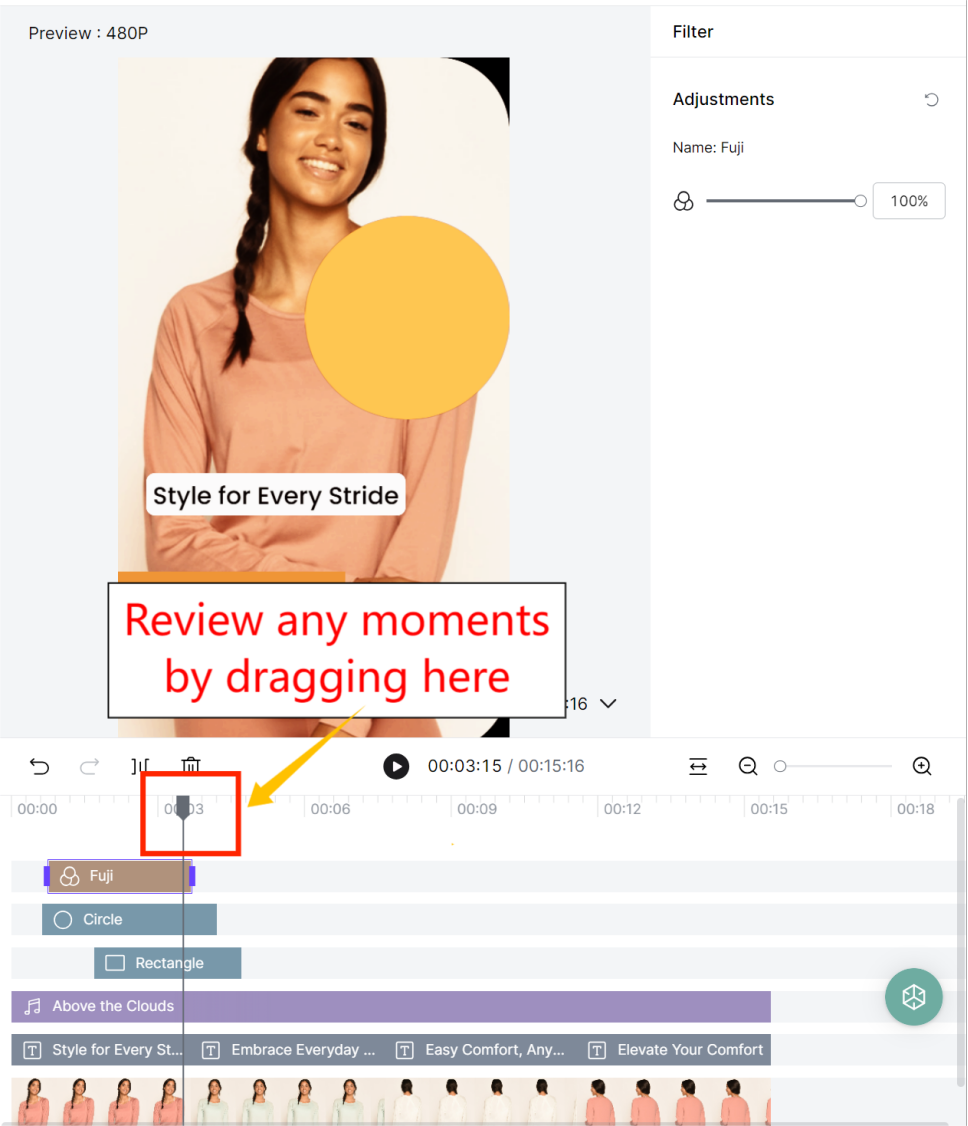
Final Adjustments and Preview:
Review your video by clicking the play button in the preview window. This step is very important to ensure smooth timing and transitions.
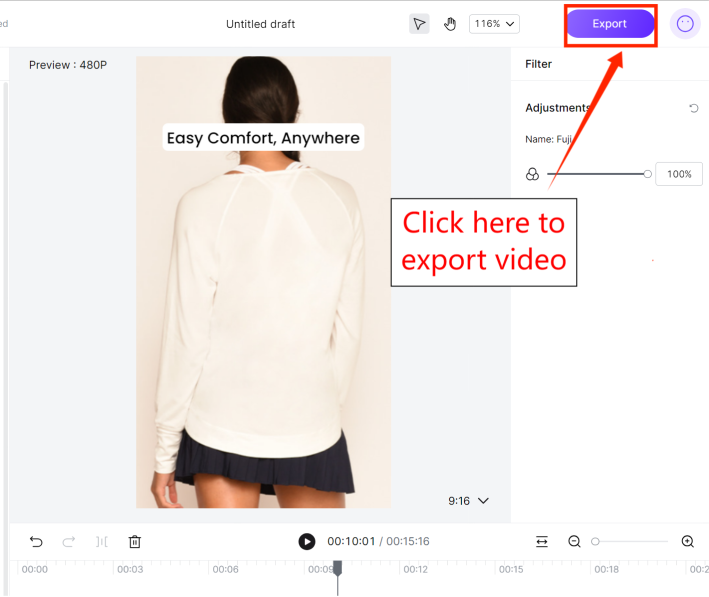
Export your video:
Once satisfied, select the video format and quality, HD (1080p) is recommended for the best viewing experience.
After exporting, find the exported video in Draft in My Space. For details, please refer to our other article:
How to use My Space?
This post will show you step-by-step how to use My Space.
Maintain engagement: Ensure your content is captivating by keeping the edits dynamic and adding transition effects.
Consistency in style: Use text styles and graphics that reflect the theme of your video to maintain a consistent style.
Optimize length: Keep your video at an optimal length; for promotional or social media videos, staying under one minute can keep the audience interested.
***Please note that the transition from “scene editor” to “edit in timeline” is not reversible. If you want to edit the scene again, you can go back to “My space” and find the green button like the one below to edit the corresponding scene draft, and then go to the new “edit in timeline”.
By following these steps and tips, you'll be able to create professional and engaging videos using Boolvideo. Happy editing!